

Refinishing Wood Floors Step By Step
Wood Floor Refinishing: The Step By Step Process
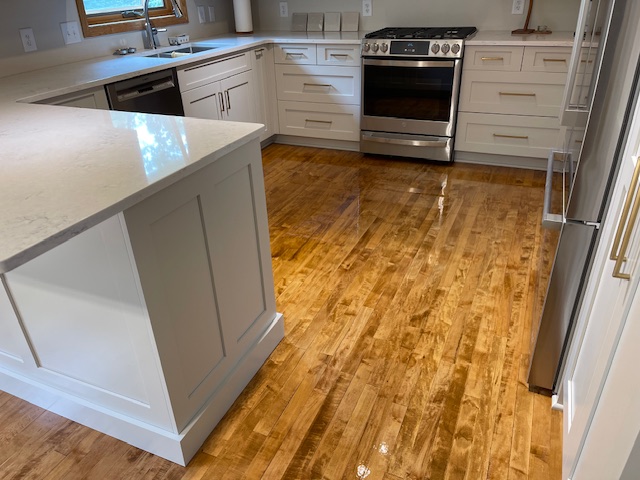
Refinishing hardwood floors is an art, and at Choice Hardwoods, we pride ourselves on perfecting this process to ensure every customer’s floor looks as beautiful as the day it was first installed. Our process is comprehensive, detail-oriented, and built on years of experience in bringing the best out of wood floors. In this article, we’ll walk you through the entire process of refinishing hardwood floors that we follow at Choice Hardwoods. From the moment we step into your home to the final coat of finish, we use industry-best practices to ensure every inch of your floor is restored to its original beauty.
Step 1: Preparing the Floors and Space
The first and most crucial step to a successful hardwood floor refinishing project is preparation. Proper preparation ensures that the refinishing job goes smoothly and minimizes any potential issues that could arise during sanding or finishing.
Cleaning and Sweeping the Floor
Before we even begin sanding, we make sure that the floor is completely clean. Any debris or dust left on the floor can become trapped in the sanding machine, which can leave unsightly gouges in your wood or damage the machine itself. This is why we start by thoroughly sweeping and cleaning your floors. Any dirt, dust, or larger particles are removed carefully to ensure nothing interferes with the sanding process.
Removing Nails, Staples, and Other Foreign Objects
During this phase, we also inspect the floor for nails, staples, or any other materials that may have been left behind from previous flooring installations or repairs. These foreign objects are dangerous because they can rip through sandpaper or cause severe damage to our sanding equipment. At Choice Hardwoods, we make sure to remove all potential obstructions to ensure a smooth and safe sanding experience.
Dust Containment
Sanding hardwood floors can create significant dust, which can easily spread to other areas of the home. To prevent this from happening, we take the time to seal off the rooms that are not being worked on. This is done using plastic sheets, ensuring that dust doesn’t travel through doorways or vents. This added protection ensures that the rest of your home remains free from dust during the entire refinishing process.
Step 2: Sanding the Floor
Now that we’ve thoroughly prepared the space, it’s time to begin the sanding process. Sanding is the most critical part of refinishing hardwood floors, as it removes old finishes, smooths imperfections, and preps the wood for a fresh, beautiful finish.
Drum Sanding: Starting with 36 Grit
Our sanding process begins with the drum sander, which is the primary tool for refinishing hardwood floors. The drum sander is equipped with a 36 grit sanding belt, which is used to remove the majority of the old finish and any deep imperfections on the floor’s surface. The coarse grit helps to break through the old layers of finish and exposes the bare wood beneath, giving us a solid foundation to work from.
Progressing Through Grits: 60, 80, and 100
After the first pass with the 36 grit, we continue the sanding process by switching to finer grits, starting with 60 grit, followed by 80 grit, and finally finishing with 100 grit. Each progression helps refine the surface and further smooths the wood to remove any sanding marks left by the coarser grits. By the time we finish sanding with the 100 grit, around 90% of the old finish has been removed, and we have a clean, smooth, and uniform surface ready for the next step.
Edging the Floor
While the drum sander is excellent for covering large areas, it cannot reach the edges of the room. This is where the edgercomes into play. The edger is a specialized sanding tool that allows us to sand right up to the edges of the room, within about 6 to 8 inches of the wall.
We start the edging process with 24 grit paper, which is more aggressive to remove old finish along the edges. Then, we switch to 60 grit paper, and finally, we finish with 100 grit to match the smoothness of the drum-sanded areas. It is crucial to properly blend the edges with the main floor surface because, if not done correctly, any ridges or lines left by the drum sander near the walls will show through the final finish, giving the floor a rough and unprofessional look.
Hand Scraping Corners and Door Jams
In addition to using the drum sander and edger, we also use hand scrapers to clean up any stubborn finish in the corners of the room or around door jams. These areas can be tricky for machines to reach, but using hand scrapers ensures that every inch of the floor is properly sanded and ready for the finishing touches.

Step 3: Preparing the Floor for Finish
Once we have sanded the entire floor down to 100 grit and removed the old finish, we begin prepping the floor for the finish. This is a critical step because it ensures that the new finish adheres properly to the wood and has a smooth, even appearance.
Buffing the Floor (For Natural-Based Finishes)
If we are applying a natural-based finish, such as a water-based or oil-based finish, we use a 120 grit buffer to further prepare the floor. This step acts as a final blending stage and smooths out the wood even further. The buffer closes up the wood’s grain more than the sanding process does, giving the surface a smoother, more polished feel. The buffing process also helps to blend any inconsistencies left by sanding, ensuring a flawless final finish.
Vacuuming and Dust Removal
Once buffing is complete, we take extra care to thoroughly vacuum the floor, removing all dust, debris, and particles that may have been left behind from the sanding process. We also inspect the trim and walls for any dust that may have settled there during sanding and clean it off. The goal is to ensure that the floor is entirely free of dust before we apply the finish. Any dust left behind can cause imperfections in the finish, such as a bumpy or gritty appearance.
Step 4: Applying the Finish
With the floor prepped and dust-free, it’s time for the final step: applying the finish. The finish is what gives the hardwood its protective coating and its beautiful shine.
Choosing the Finish
At Choice Hardwoods, we offer both water-based and oil-based finishes. Both types have their benefits, and we help our customers choose the right finish based on their needs and preferences. Water-based finishes tend to dry faster and have less odor, while oil-based finishes provide a more traditional, rich appearance with a more extended drying time.
Application Process
To apply the finish, we use a 9” roller to ensure even coverage and blending. The roller allows for a smooth, consistent application with minimal chances for streaks or stop marks. Applying finish around tricky areas like closets or kitchen islands can be difficult, and it’s essential to plan the application carefully to avoid leaving marks. We always make sure we have a clear exit strategy in mind before applying the first drop of finish. This means we plan out how we will move through the room and ensure we don’t end up walking on or disrupting wet finish as we finish the job.
After the first coat of finish is applied, we allow it to dry and then lightly sand the surface with a fine grit to remove any imperfections. A second coat is then applied to give the floor extra protection and shine. Depending on the desired look and durability, some floors may require a third coat of finish.
Step 5: Final Inspection and Touch-Ups
Once the finish has dried, we conduct a final inspection of the floor to ensure there are no missed spots, bubbles, or imperfections. If necessary, we do any touch-ups to ensure that the finish is perfect. We also make sure that the floor feels smooth to the touch and that the sheen is consistent across the entire floor.
Conclusion
The refinishing process at Choice Hardwoods is a detailed, multi-step process that requires skill, expertise, and a commitment to quality. From the careful preparation of the space to the sanding, buffing, and finish application, we take every measure to ensure that your hardwood floors look beautiful and last for many years to come.
If you’re considering refinishing your hardwood floors, you can trust Choice Hardwoods to provide a professional, thorough service that brings your floors back to life. Let us help you restore your hardwood floors to their original beauty.
Page Content
Toggle