

Fixing Squeaky Hardwood Floors

My Hardwood Floor Has Squeaks: How Can I Fix This?
Fixing Squeaks in Hardwood Floors: A Comprehensive Guide
Squeaky hardwood floors can be incredibly frustrating, whether you’re trying to sleep or moving around your home during the day. The annoying creaks and groans can feel like they’re constantly drawing attention to themselves, but there is good news: fixing squeaks in hardwood floors is often manageable with the right approach. Depending on the severity of the issue, you can either go with simple solutions or more involved techniques. This article will delve into the causes of floor squeaks, explain basic and more intrusive methods to fix them, and discuss how you can restore the appearance of your hardwood floors once repairs are completed.
Understanding the Causes of Squeaks in Hardwood Floors
Before diving into the solutions, it’s important to understand why hardwood floors squeak in the first place. There are several reasons why hardwood floors make noise:
- Loose Floorboards: Over time, the nails or screws holding the floorboards in place can loosen. This is one of the most common causes of squeaks, as loose boards shift when you walk over them.
- Movement in the Subfloor: The subfloor (the layer beneath your hardwood) can sometimes shift or separate from the joists underneath. If the subfloor isn’t securely fastened, the movement can create squeaks as the boards rub against each other.
- Environmental Changes: Changes in temperature and humidity can cause hardwood to expand and contract. As the wood shifts, the gap between boards may become larger, causing friction and squeaks.
- Age of the Floor: Older floors may be more prone to squeaking simply due to wear and tear. Over time, the materials that make up the floor can weaken or become misaligned.
- Improper Installation: If the hardwood floor was improperly installed, there may not have been enough fastening at the right points or there may be gaps between boards or subfloor layers, all of which can lead to squeaks.
Basic Fixes for Squeaky Hardwood Floors
The simplest and least invasive method for fixing squeaks in hardwood floors involves securing loose floorboards. This is often an ideal solution when the squeak is caused by loose nails or screws that aren’t holding the boards tightly enough.
1. Using GRK Trim Screws to Secure Loose Boards
One of the easiest ways to fix squeaks in a hardwood floor is by using small-headed GRK trim screws. These screws are designed to be discreet and will provide a secure hold without damaging the wood. Here’s how to go about it:
- Locate the Squeak: Identify the floorboards that are causing the squeak. You can usually pinpoint this by walking over the floor and listening closely.
- Use a Drill: Drill a small pilot hole through the surface of the squeaky board and into the subfloor beneath it.
- Insert GRK Trim Screws: Insert the GRK trim screws into the pilot holes. The small head of the screw ensures that it won’t stand out on the surface of the board.
- Fill the Holes: Once the screws are in place, use wood filler to fill the holes. Choose a filler that matches the color of your floor for a seamless finish.
- Smooth and Sand: After the filler has dried, lightly sand the area to ensure the surface is smooth and even.
This method is quick, non-invasive, and perfect for smaller squeaks. However, it may not address the underlying issue if there are larger gaps or problems with the subfloor itself.
2. Filling the Holes with Wood Fill
After securing the loose floorboards with GRK trim screws, you’ll likely have small holes to fill. To do this:
- Choose a wood filler that closely matches the color and texture of your hardwood floors.
- Apply the filler directly into the holes and smooth it out with a putty knife.
- Allow the filler to dry completely before sanding the area flush with the surrounding floor.
- Once the sanding is complete, you may want to stain the filled areas to match the rest of the floor.
While this method is effective for securing boards, it does not address deeper issues, like subfloor instability or issues with joist support.
Intrusive Fixes for More Severe Squeaks
When the basic fix doesn’t work, or if you have more extensive squeaks due to movement in the subfloor or joists, a more invasive repair may be necessary. These fixes can be more time-consuming but will address the underlying causes of squeaks more effectively.
1. Removing and Reinstalling Floorboards
In some cases, the problem lies not in the floorboards themselves, but in the subfloor beneath them. If the subfloor has come loose or shifted, it will need to be properly secured to eliminate squeaks. Here’s how you can do this:
- Remove the Affected Floorboards: Start by carefully prying up the floorboards in the affected area. You can use a crowbar or a specialized floorboard remover to carefully lift the boards without damaging them.
- Check the Subfloor: Once the boards are removed, you can examine the subfloor. If it’s loose or not properly fastened to the joists, this could be the source of the squeak.
- Re-secure the Subfloor: Use screws or nails to fasten the subfloor securely to the joists underneath. Be sure to drive the fasteners deep enough to hold the subfloor in place.
- Reinstall the Floorboards: Once the subfloor is secure, reinstall the floorboards. You may need to use additional nails or screws to ensure they are firmly attached.
This method is more involved than using GRK screws but will address the root cause of the squeak, especially if the subfloor has become loose or misaligned.
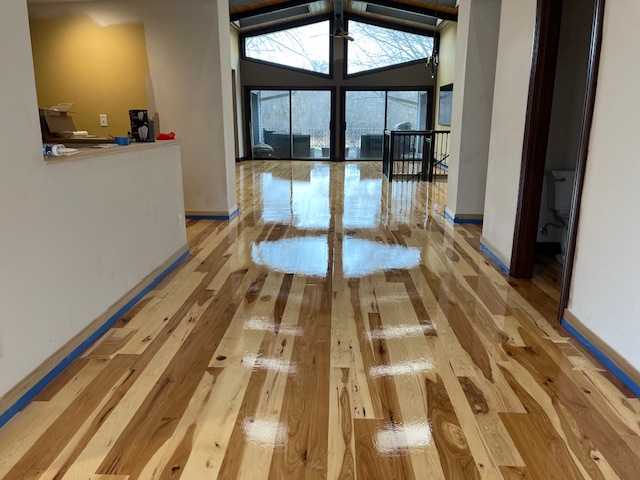
2. Performing a Full Sand and Finish
Once you’ve fixed the squeaks in the hardwood floor, you may need to restore the aesthetic appearance of the floor. The process of sanding and finishing the floor helps to blend any repairs, restore the wood’s original shine, and ensure a uniform surface.
- Sand the Entire Floor: Use a floor sander to remove any rough patches, filled areas, and imperfections caused by repairs. Sand the entire floor to ensure an even surface.
- Refinish the Floor: After sanding, apply a fresh coat of stain to match the rest of the floor. Once the stain has dried, apply a protective layer of polyurethane or another finish to seal the wood and protect it from future damage.
- Buff and Polish: For an even smoother finish, buff and polish the floor once the finish has dried to restore its shine.
A full sand and finish is usually recommended if your hardwood floors have taken a hit from extensive repairs, or if the floor’s finish has worn out over time. It’s a great way to breathe new life into the floors after more invasive fixes.
Conclusion: Balancing Quick Fixes and Long-Term Solutions
Fixing squeaks in a hardwood floor can range from a simple task that takes just a few hours to an involved process that requires a significant amount of time and effort. The choice between a basic fix and a more invasive solution depends largely on the severity of the squeak and the underlying cause.
For minor squeaks, using GRK trim screws and wood filler is often enough. This is a straightforward, non-invasive fix that should work for most situations involving loose boards. However, if you’re dealing with a deeper issue, such as a loose subfloor or issues with the joists, it’s better to take a more intrusive approach. Removing floorboards, securing the subfloor, and then reinstalling the boards may take more time, but it will address the core problem and eliminate the squeaks for good.
Ultimately, your decision will come down to how much time and effort you want to invest in fixing squeaks in your hardwood floor. For persistent problems, a full sand and finish may be necessary to restore your floors to their former glory and create a smooth, uniform surface. Regardless of the method you choose, properly fixing squeaks will leave you with a quieter, more stable floor to enjoy for years to come.
The Need for Hardwood Floor Refinishing in Most Squeaky Floor Fixes
When it comes to fixing squeaks in hardwood floors, it’s often easy to overlook the need for an extensive solution, but in most cases, a more thorough fix is required. While minor fixes like using small-headed GRK trim screws to secure loose boards may work temporarily, achieving lasting results typically means addressing the underlying issues of the floor. In these situations, the need for hardwood floor refinishing and hardwood floor sanding becomes inevitable.
In many cases, especially with older floors, the cause of squeaks is not just loose boards but a combination of factors such as shifts in the subfloor or misaligned joists. These issues often require removing sections of the floor to ensure everything is properly secured before reassembling the floor. Once this is done, the next step is to focus on restoring the floor to its original look. Hardwood floor refinishing is necessary to address the damage caused by invasive repairs and to ensure a smooth, seamless appearance.
Hardwood floor sanding is a crucial step in this process. After fixing the squeaks by securing the subfloor and reinstalling the floorboards, sanding is required to remove any rough patches, filler, or inconsistencies left by the repairs. This ensures that the surface of the floor is even, smooth, and free from noticeable blemishes. Without hardwood floor sanding, your floor will likely have visible signs of the work that’s been done, which will detract from the floor’s appearance.
Once the sanding is complete, hardwood floor refinishing is the next step. This includes applying a new finish to seal the wood and protect it from future wear. Refinishing not only restores the floor’s appearance but also enhances its durability. If you want to keep your hardwood floor looking its best and prevent future squeaks, refinishing is an essential step.
In summary, fixing squeaks in hardwood floors goes beyond simply securing the loose boards. In most cases, a more involved approach, including hardwood floor sanding and hardwood floor refinishing, is necessary to restore the floor’s function and appearance. Whether you choose to tackle the repairs yourself or hire a professional, remember that ensuring your floor is properly refinished will lead to a long-lasting, squeak-free, beautiful hardwood floor.
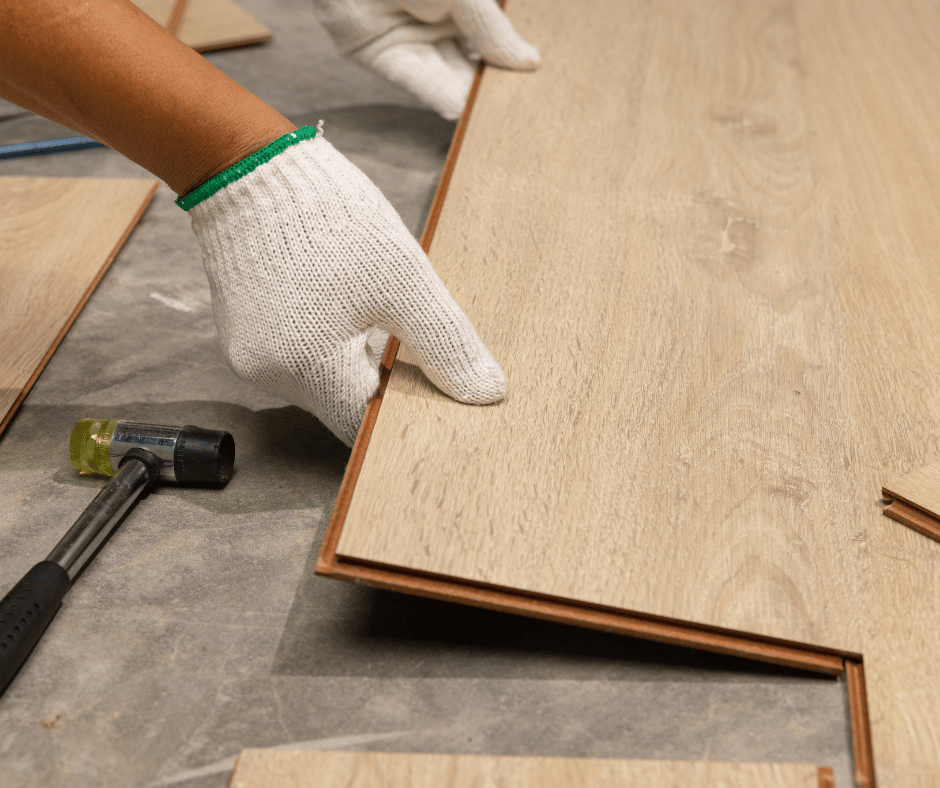
Fixing Squeaks Before Hardwood Floor Installation: A Crucial Step by Choice Hardwoods
When preparing to install a new hardwood floor, many homeowners focus on aesthetic choices and the design of the floor itself. However, one crucial step often gets overlooked: fixing squeaks in the existing subfloor. At Choice Hardwoods, we understand that hardwood floor installation is not just about placing a new floor but also about creating a solid foundation. Fixing squeaky subfloors before installing a wood floor is essential for a smooth, long-lasting result.
Squeaky floors usually originate from issues in the subfloor beneath the surface. When installing a wood floor, it is critical to ensure that the subfloor is free from any movement or instability. If left unresolved, the squeaks will likely transfer to the new hardwood, causing frustration down the line. By addressing the issue before beginning the hardwood floor installation, you’ll avoid unnecessary complications later on.
The process of fixing squeaks prior to installing a new hardwood floor typically involves thoroughly inspecting the subfloor for any loose or poorly secured sections. If the subfloor is not fastened securely to the joists or has gaps, these can cause creaking sounds as the wood moves. In this case, the subfloor may need to be re-secured, ensuring a solid base for the new hardwood flooring.
Once the subfloor issues have been addressed, it’s time to focus on hardwood floor installation itself. The new hardwood flooring can now be installed with confidence, knowing that there won’t be any issues with squeaks. This careful, methodical approach helps create a smoother, quieter floor that will stand the test of time.
At Choice Hardwoods, we emphasize the importance of fixing squeaks before starting any installation. Installing a wood floor over an unstable subfloor will lead to more issues in the future, from noise to potential damage. By taking the time to resolve squeaks early in the process, you ensure the longevity of your hardwood floors and avoid unnecessary headaches down the line.
In conclusion, fixing squeaks in the subfloor before installing a wood floor is a crucial step to achieving a quality, long-lasting result. At Choice Hardwoods, we incorporate this essential step in every project, ensuring your new floors not only look beautiful but also function perfectly.
Page Content
Toggle