

How To Prepare Your Home For Floor Refinishing
Prepping Your Home For Your Flooring Project
At Choice Hardwoods, we understand that refinishing your hardwood floors is a major investment—not just in the appearance of your home, but also in its long-term value and livability. One of the most common questions we receive from homeowners in Minnetonka and surrounding areas is: “What do I need to do before you arrive to refinish our floors?”
Proper preparation is essential. While our team brings years of experience, advanced equipment, and industry-best practices to every project, the more prepared your home is, the smoother and cleaner the process will be—for everyone involved.
In this guide, we’ll walk you through exactly how to prep your home for floor refinishing, ensuring minimal disruption and maximum results.
Clear the Space Completely
Remove All Furniture and Rugs
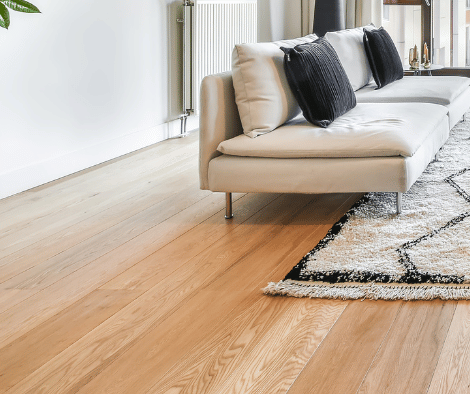
One of the most important steps in preparing your home is to completely clear the work area. This includes removing all furniture, area rugs, floor lamps, and anything else sitting directly on the hardwood. While it might seem like a small detail, even the smallest piece left behind can obstruct our equipment or slow down the process.
Not only does moving everything out protect your belongings from dust and damage, it allows us to refinish your floors evenly from wall to wall without awkward transitions or missed spots. If the room connects to other hardwood areas, you may want to consider refinishing them all at once for the most consistent result.
Long-tail keywords to consider:
move furniture before refinishing
clearing hardwood floor areas
Don’t Forget the Smaller Items
Once the big items are out, be sure to remove all smaller décor elements too. This includes:
Lamps
Plant stands
Baskets
Pet beds
Extension cords or tech accessories
Leaving items behind can become a tripping hazard or pick up airborne dust during sanding. A good rule of thumb: if you can pick it up, take it out.
Special Considerations for Wall Hangings and Décor
Even though your artwork and photographs aren’t directly on the floor, we strongly recommend removing fine art, personal photos, and wall-mounted decorations. During sanding, fine dust can float upward and settle on walls, ledges, and any exposed surfaces. While we use dust containment systems, no method is 100% dust-free.
Removing these items protects them from both dust and vibrations caused by our sanding equipment. It’s particularly important for:
Framed photographs
Canvas artwork
Wall-mounted mirrors
Decorative shelves and their contents
If you prefer not to remove them, be sure to cover them thoroughly using plastic sheeting and painter’s tape.
Understand the Nature of Fine Dust
Even with our industry-leading dust control systems and careful sealing of work areas, some fine hardwood dust will be present during the refinishing process. This is completely normal and expected. It’s part of the trade-off for achieving beautifully restored floors.
Dust can settle on:
Window ledges
Baseboards and trim
Countertops
Cabinet surfaces
HVAC vents and grilles
That’s why taking the time to protect your surrounding spaces can make cleanup quicker and prevent unnecessary dust exposure.
Turn Off HVAC Systems During Sanding
We recommend temporarily turning off your air conditioning or forced-air heating during the sanding portion of the refinishing process. This helps prevent airborne dust from being pulled into your ducts and circulated throughout the house.
Before we begin, be sure to:
Shut off your central HVAC system (heating/cooling) if possible
Close all vents and registers in the work area
Avoid turning on ceiling fans or portable fans that could stir up dust
Once sanding is complete and final coats are applied, you can safely turn systems back on.
Seal Off Adjacent Rooms
Our team will typically install plastic sheeting or temporary barriers to close off the area being worked on, but if you’d like to add an extra layer of protection to rooms that aren’t directly involved, here are a few DIY steps:
Hang plastic sheeting in open doorways
Use painter’s tape around door frames
Place a damp towel at the base of the door to block fine particles
If you have open floor plans or connected spaces, it may be necessary to temporarily isolate large areas of your home.
Make Alternate Living Arrangements if Needed
During the refinishing process, the work area will be off-limits. That means no walking on the floor during sanding or while the finish is curing. Depending on the size of your project, this can take several days from start to finish.
If your only bathroom or kitchen is in the refinishing zone, or if the project spans your entire main level, we strongly suggest:
Staying with friends or family
Booking a short-term rental
Making alternate arrangements for pets
Not only is this more convenient for you, but it allows our team to work more efficiently and safely.
Long-tail keywords to consider:
stay elsewhere during refinishing
protect pets from floor fumes
Be Mindful of Odors and Fumes
Depending on your chosen finish—oil-based or water-based—you may notice some odors or VOCs (volatile organic compounds) during application. While we always ventilate the space and follow safety protocols, sensitive individuals (such as children, elderly family members, or those with respiratory issues) may prefer to avoid the home during this time.
Water-based finishes tend to have lower odor and faster dry times, which is something we can discuss with you during the consultation.
Secure or Remove Valuables and Fragile Items
In addition to fine art and photos, it’s a good idea to secure valuables, fragile keepsakes, or heirloom items in another part of the house or offsite. While we take every precaution to protect your belongings, vibration and movement can be unpredictable during heavy sanding.
Think about:
China cabinets or display cases
Antiques and family heirlooms
Glass tabletops or shelving
Musical instruments or electronics
If something is irreplaceable, it’s best to remove it entirely for peace of mind.
Prepare Outdoor Access if Needed
We may need access to your home through alternate entry points, especially for unloading or loading equipment. Please ensure walkways and garage access for flooring contractors are clear and safe, and notify us in advance of any restrictions like keypad entry, security systems, or pets in the yard.
Final Thoughts from Choice Hardwoods
We know that having your hardwood floors refinished is a big undertaking—but it’s also an exciting one. At Choice Hardwoods, we aim to make the experience as smooth, clean, and stress-free as possible. When your home is properly prepped, our team can focus on what we do best: restoring your wood floors to their original beauty.
Remember:
Clear the space entirely, including furniture, rugs, and wall décor
Take precautions to manage dust and HVAC systems
Plan ahead for temporary inconveniences and safety concerns
By working together and following this guide, you’ll set the stage for a successful refinishing project—and enjoy stunning, long-lasting results.
If you have any questions about how to prep for hardwood floor refinishing, just ask. We’re always happy to help you plan for a seamless process from start to finish.
Page Content
Toggle